One of the errors in the Boot Error with the error code 0xc0000098. Microsoft, after Windows Vista, implemented a protocol/procedure named BootManager (BOOTMGR), which stores all the necessary files to boot into the operating system. The issue with the error code 0xc0000098 is occurred mainly due to two problems. First, the Boot Configuration Data (BCD) somehow got wiped may be due to sudden shutdown, boot sector virus, or disk write errors. Second, you installed any wrong hard drive driver, which caused the issue.
Fix Boot Error 0xc0000098 in Windows 10
Here are a Few Potential Solutions to Fix 0xc0000098 Error on Windows PC
Method 1. Automatic Startup Repair
This is Windows’ own troubleshooting solution to fix and repair any broken settings. For doing so, we will have to boot into Windows Recovery Environment (WinRE). However, again for booting into Windows Recovery Environment, generally, we use the Windows Installation Media. Also, there is a trick to boot in to WRE even without any installation media. We are going to mention both the methods to boot into WinRE, you go with whatever suits you.
Using Windows Installation Media
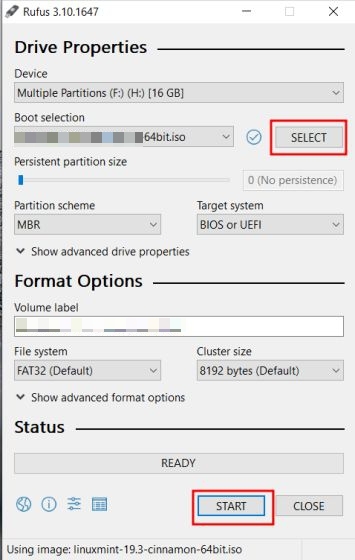
Download the latest Windows 10 ISO file from Microsoft’s site.Now, download Rufus from here to make a bootable Windows Installation Media.Insert a flash drive and then open Rufus and follow the on-screen instructions to create the bootable media.
After completion, insert the drive into the system with 0xc0000098 Error.Now, push the start/power button and press the pre-assigned button to open the Boot Options menu.
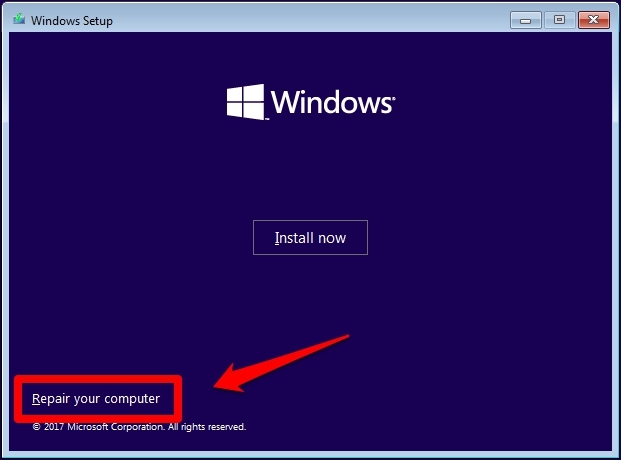
After opening Boot Menu, select the flash drive to start Windows Installation.In a couple of moments, you will see this screen.
Click on the ‘Repair This Computer‘ or press the ‘R‘ button to open Windows Recovery Environment.
The Trick to Boot into Windows Recovery Environment
Press the power button to start the PC.While Windows is starting up (the spinning dots), press and hold the power button until the system shuts down forcefully.Now, repeat the above two processes again.On the third start, the system will automatically go into Windows Recovery Environment.
Steps to Initiate Automatic Startup Repair
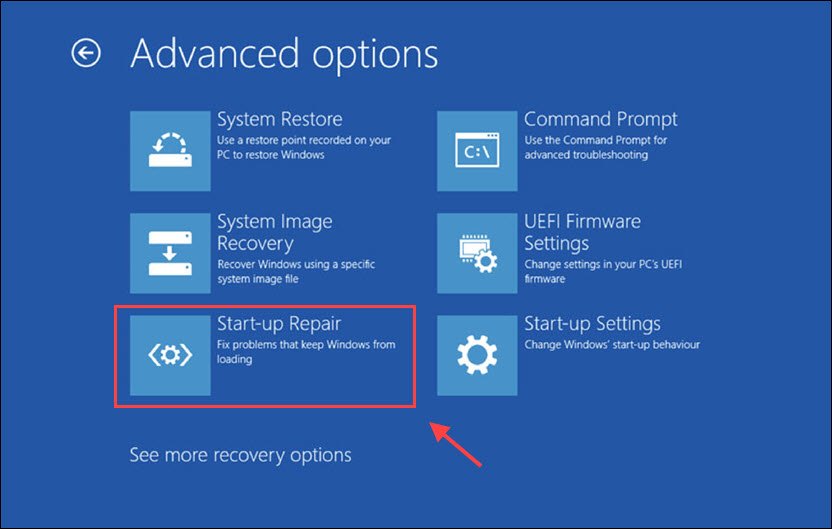
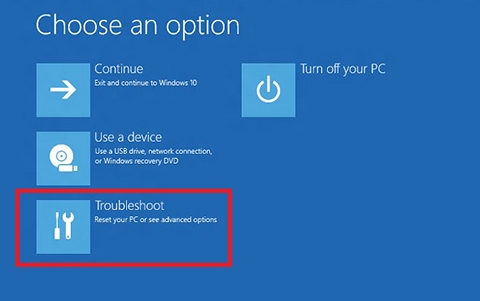
Now, you have successfully booted into WRE, press the ‘Troubleshoot’ option.
Then, tap on Advanced Option, and finally, tap on the Startup Repair option.
Now, the system will automatically repair the problem (if any) and will automatically restart the system.
Method 2. By Rebuilding Boot Configuration Data (BCD)
In this method, we are going to fix the boot related problems by rebuilding Boot Configuration Data (BCD). BCD is a database that stores all boot related information that helps the system to start the OS.
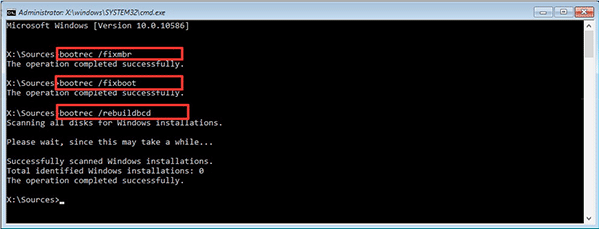
Follow the steps in the 1st method to open the Windows Recovery Environment.After opening the WinRE, tap on the Troubleshoot option then Advanced Options.Now, tap on the Command Prompt.After opening the CMD, execute the following commands one-by-one,
After that, close the CMD and restart the system.
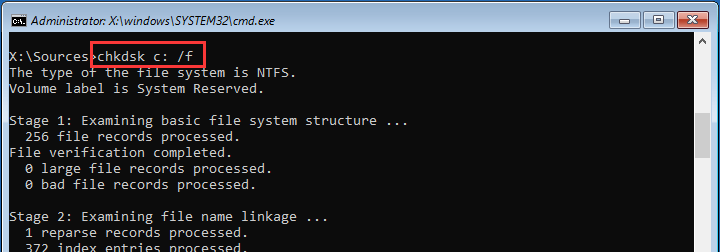
Method 3. By Using Check Disk (CHKDSK)
In this method, we are going to use the Check Disk (CHKDSK) utility. In case the hard disk is compromised, this utility will help to repair the issues like bad sector, problematic system partition/file, etc.
Follow the steps in the 1st method to open the Windows Recovery Environment.After opening the WRE, tap on the Troubleshoot option then Advanced Options.Now, tap on the Command Prompt.After opening the CMD, execute the following command.
This will execute automatically and repair the problems (if any). After that, you can close the CMD window and restart it normally.
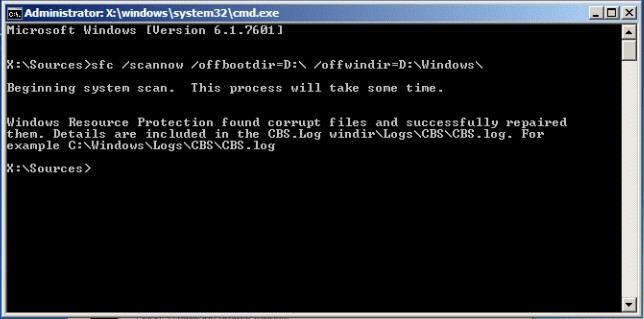
Method 4. By Using System File Checker (SFC)
In this method, we are going to scan and repair any corrupted system files.
Follow the steps in the 1st method to open the Windows Recovery Environment.After opening the WRE, tap on the Troubleshoot option then Advanced Options.Now, tap on the Command Prompt.After opening the CMD, execute the following command.
After the completion, you can close the CMD window and restart it normally
Method 5. Reset via Windows Recovery Environment
If none of the above methods worked then we will try to reset the system from the WinRE. This will restore to the last stable version of Windows 10. Note: This method will erase and uninstall any third-party software installed. Proceed with caution.
Follow the steps from Method 1 and boot into WinRE mode.After opening, tap on the Troubleshoot option.
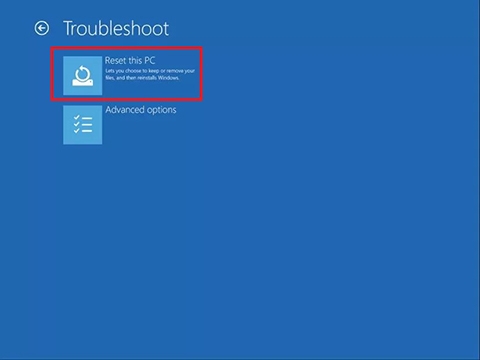
Then click on the Reset this PC option.
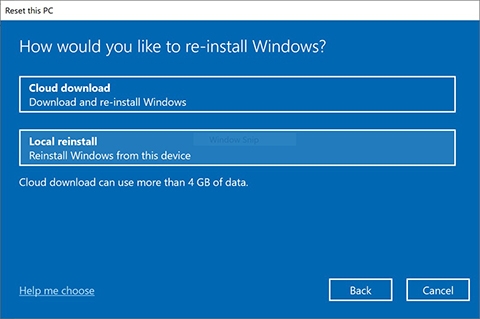
A new window will pop up, with two options. We recommend you use the Local Reinstall option. Cloud download: It will download and reinstall Windows. Local Reinstall: It will reinstall Windows from previously saved files.
After that, you will be asked, whether you want to erase everything or keep personal files. Keep my Files: It will restore all the settings and delete the installed apps. Remove Everything: It will remove everything, even delete your personal files.
Now, a final window will appear with all the settings you just chose, and a button labeled Reset.Click on the reset button and wait for a few minutes and in the worst-case hours.
Method 6. Clean Installation of Windows
In this method, we are going to clean install Windows 10 from scratch.
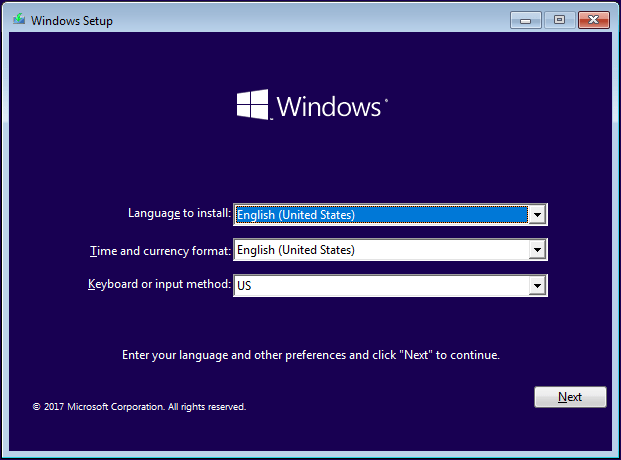
Download the latest Windows 10 ISO file from Microsoft’s site.Now, download Rufus from here to make a bootable Windows Installation Media.Insert a flash drive and then open Rufus and follow the on-screen instructions to create the bootable media.After completion, insert the drive into the system.Now, push the start/power button and press the pre-assigned button (Acer: F12, Asus: F8, Dell: F12, HP: F9) to open the Boot Options menu.After opening Boot Menu, select the flash drive to start Windows Installation.Now, select your preferred language and keyboard.
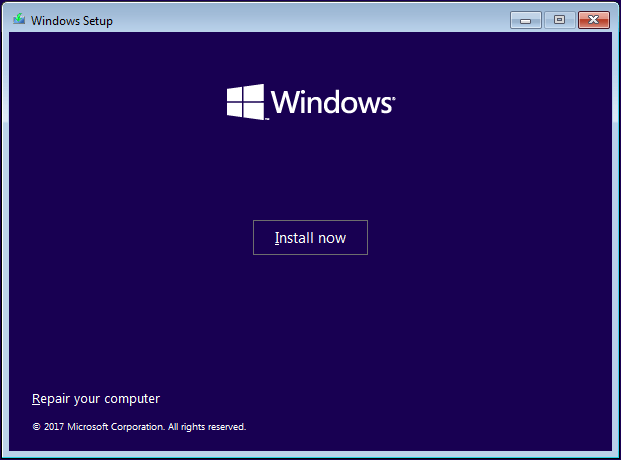
You will see this type of Window, select the Install Now button.
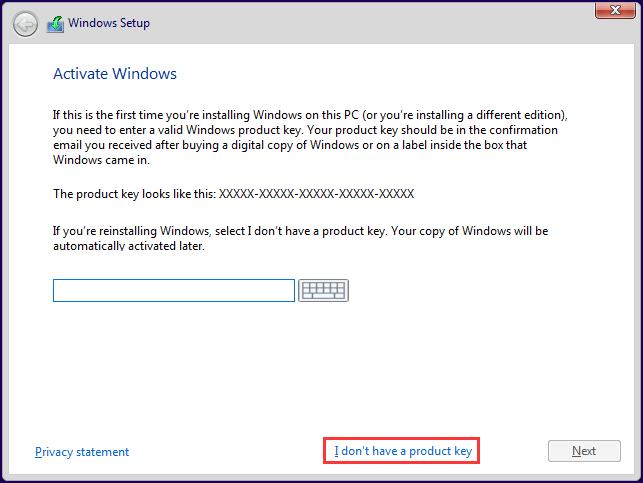
If your Windows isn’t activated, you will be asked to enter the Product, if you don’t have any, then simply click on the ‘I don’t have a product key’ label to skip it.
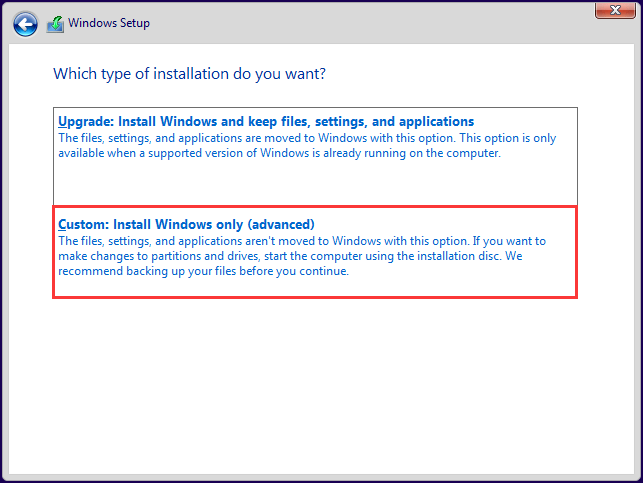
Now, you will be asked to accept the license agreement. Accept and then click the Next button.Now, select the Custom: Install Windows only (advanced).
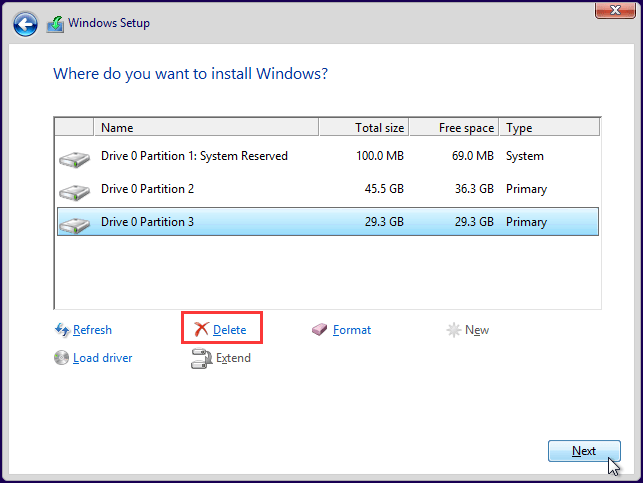
After that, a new window will appear with all the drives, delete the C drive, and click Next.
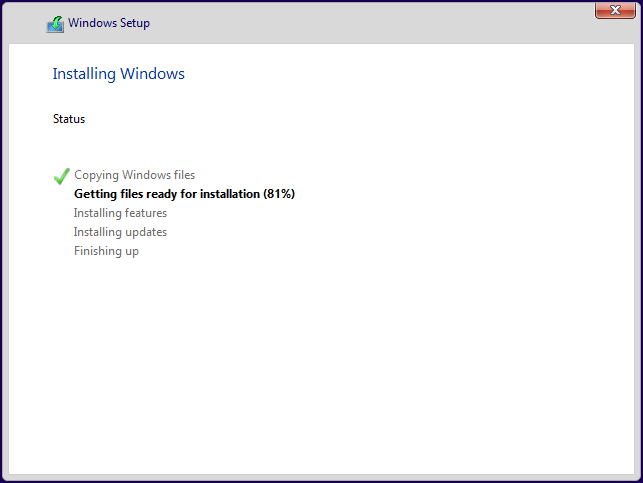
Now, the Windows installation will start and will be finished in a couple of minutes, depending on the speed of your machine.
Conclusion: Is your PC not starting and you are facing 0xc0000098 Code on Windows 10 then the guide below will Help you Fix the Boot Issues. If you’ve any thoughts on How to Fix Boot Error 0xc0000098 in Windows 10?, then feel free to drop in below comment box. Also, please subscribe to our DigitBin YouTube channel for videos tutorials. Cheers!